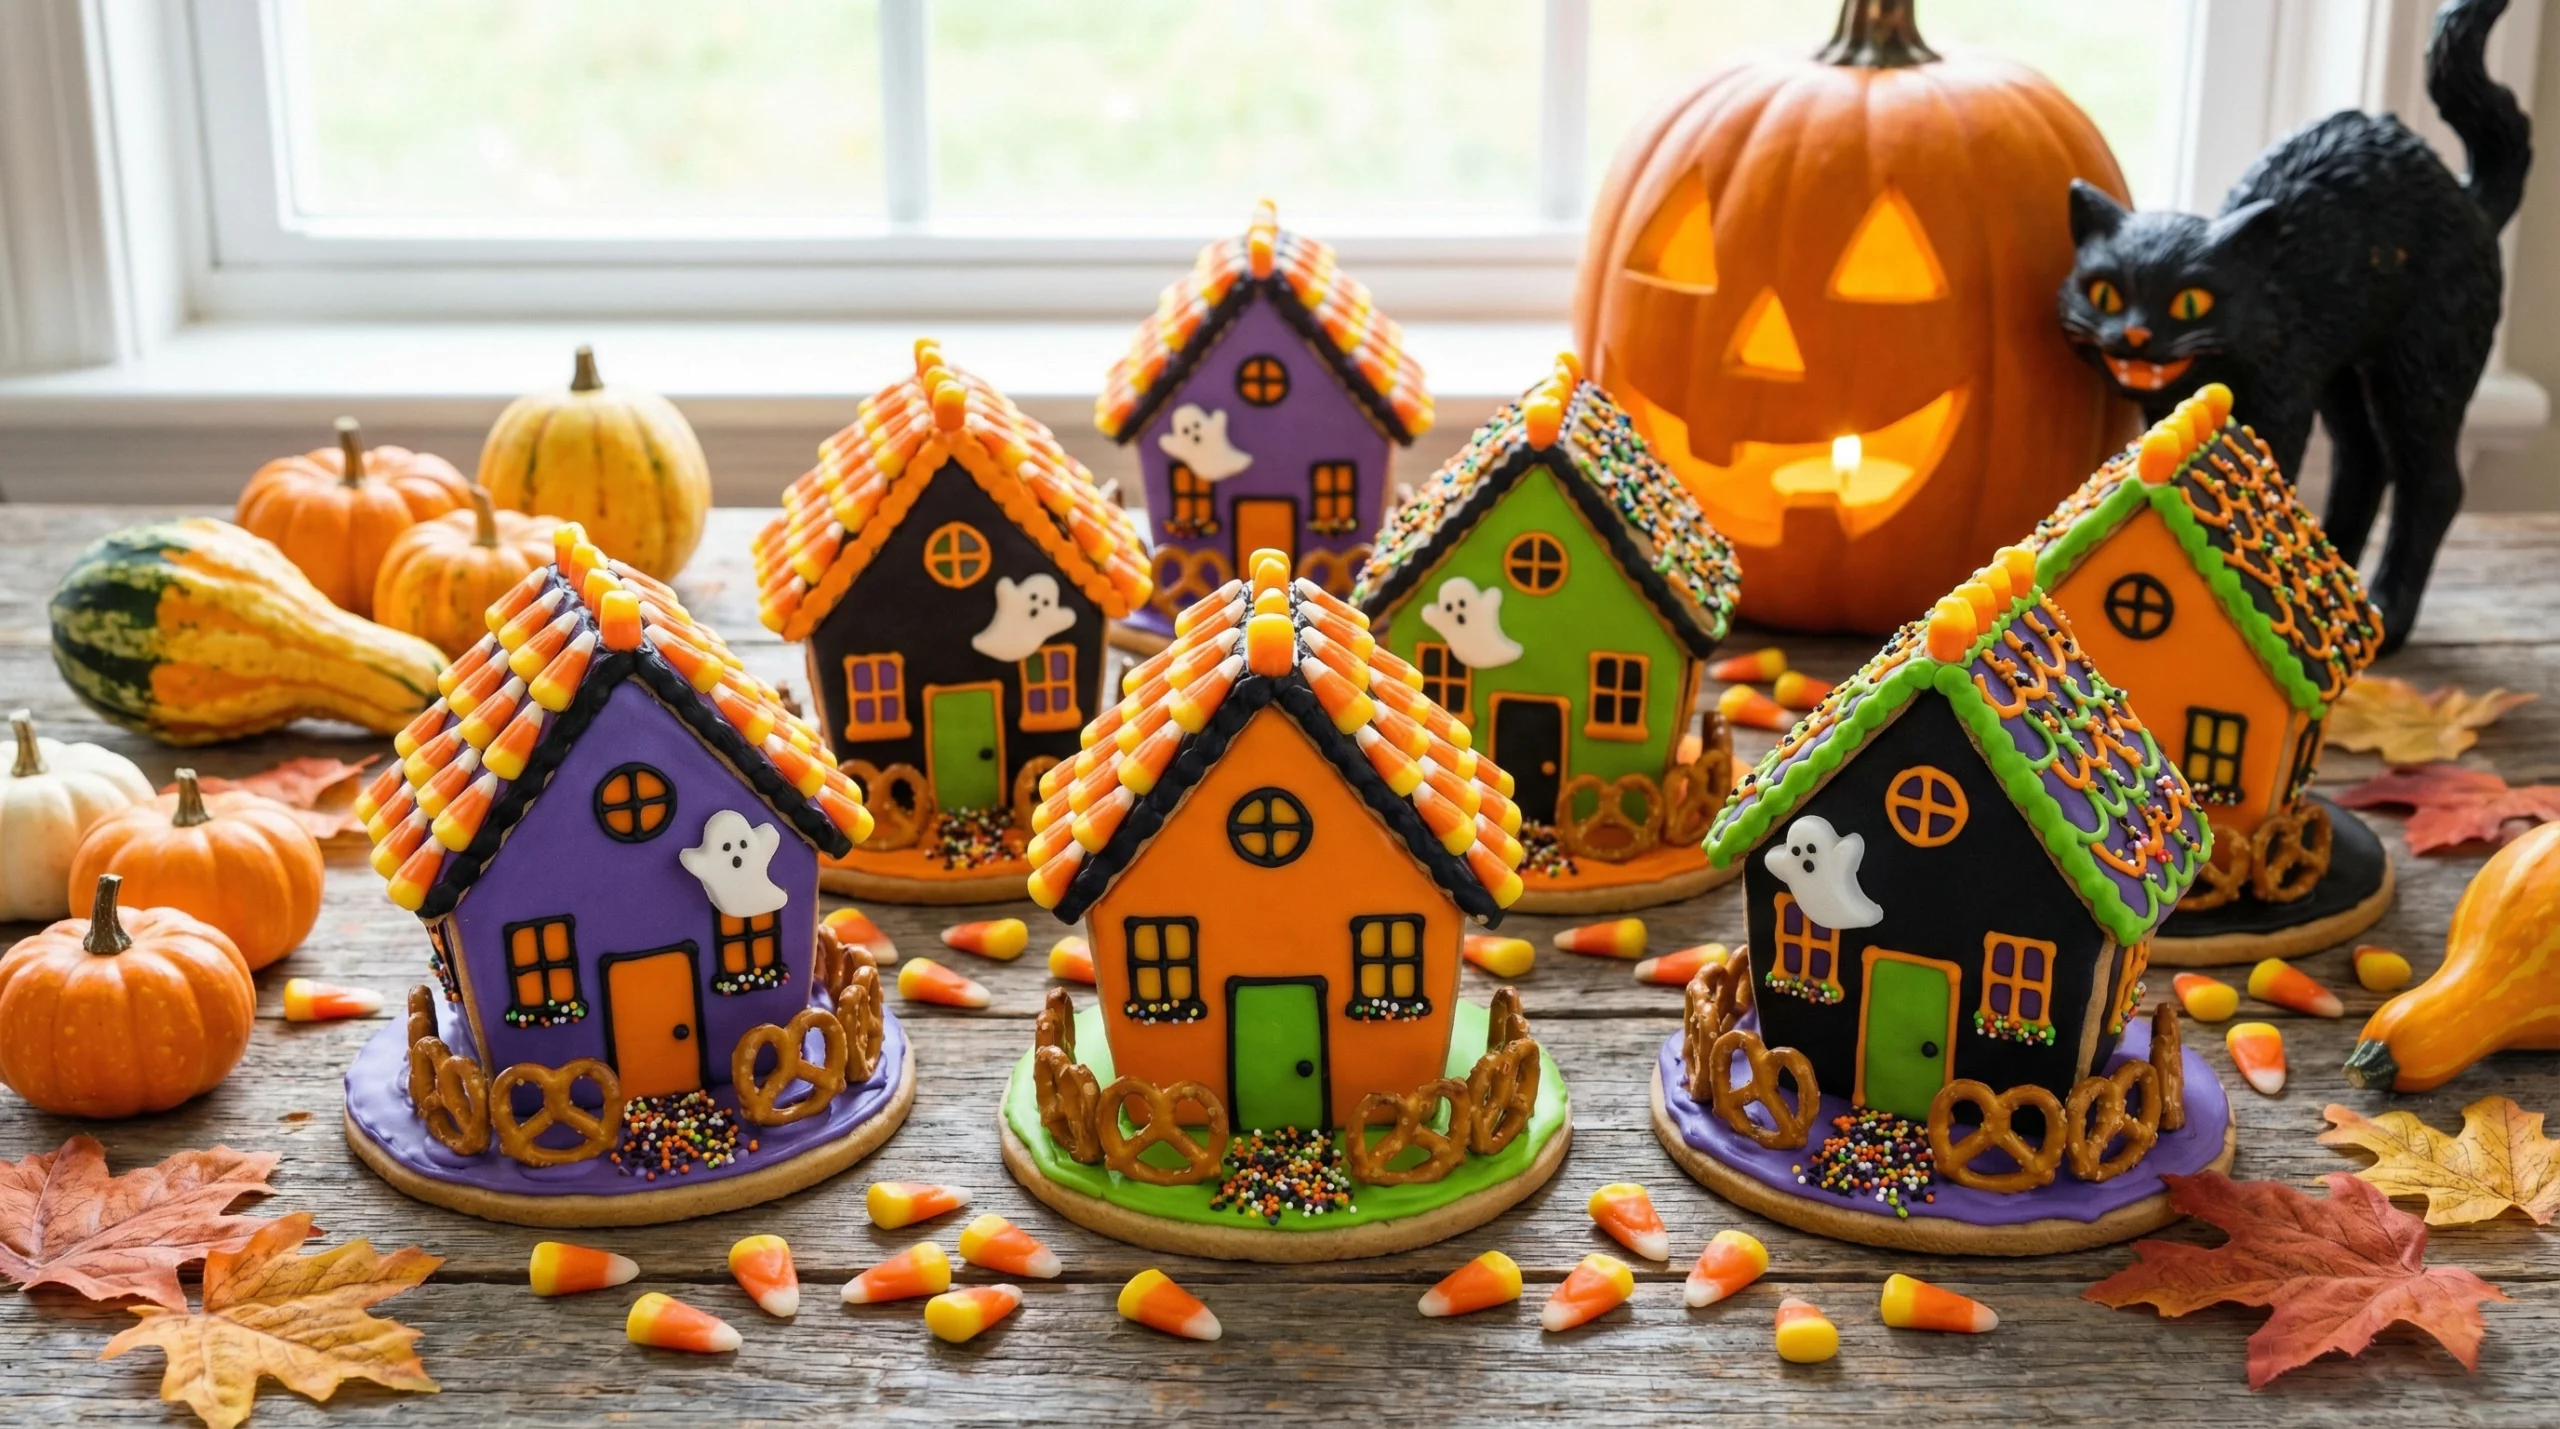
Haunted house cookies bring spooky fun to your kitchen and make the perfect treat for Halloween parties or a creative baking day. I’ve baked these cookies for both kids and grownups, and everyone basically loves them. You don’t have to be a pro to whip up these edible haunted mansions; most of the fun is in decorating and using your imagination. Here’s my guide to making haunted house cookies from scratch, with all my favorite tips for getting those ghostly details just right.

Gathering Ingredients and Tools for Haunted House Cookies
A good haunted house cookie starts with the dough. I use a sturdy sugar cookie recipe, since it holds its shape when cut into fun haunted house designs. Royal icing is my go-to for decorating because it dries hard and lets you add lots of details. Here’s what you’ll need:
- Flour: All purpose is the way to go; gives you a reliable dough that doesn’t spread too much.
- Butter: Unsalted, softened to room temperature for easy mixing.
- Sugar: I like using fine granulated sugar for the best texture.
- Eggs: One or two, depending on your recipe size; they help the dough come together.
- Vanilla and Almond Extract: Vanilla is classic for sugar cookies, while a little almond extract adds a nice twist.
- Baking Powder and Salt: Both keep the cookies light and tasty.
- Royal Icing Ingredients: Powdered sugar, egg whites or meringue powder, and a bit of water.
- Food Coloring: Black, orange, purple, green, and yellow are the most popular for a haunted look.
- Candy Decorations: Mini chocolate chips, candy eyes, sprinkles, and licorice laces make cool windows, bats, and doors.
I use haunted house cookie cutters, but you can also just cut out house shapes with a knife if you’re feeling creative. A piping bag or squeeze bottle and some toothpicks help a ton when adding icing details.
Making the Haunted House Cookie Dough
The process for sugar cookies is straightforward, but there are a few things that make a huge difference:
- Cream the Butter and Sugar: Beat until fluffy. This makes the cookies tender and helps them keep their shape.
- Add the Egg and Extracts: I like to mix in the vanilla and almond with the egg for even blending.
- Mix Dry Ingredients Separately: Sifting flour, baking powder, and salt keeps the dough smooth and prevents little clumps.
- Combine Wet and Dry: Do this gently; overmixing makes the cookies tough.
- Chill the Dough: Letting it hang out in the fridge for at least an hour is really important. Cold dough is way easier to roll and keeps the cookie shapes sharp during baking.
When I bake these, I always roll the dough between sheets of parchment. It saves a mess and makes it way easier to transfer big cookie shapes to the baking sheet.
Shaping and Baking Your Haunted Houses
I roll the dough out to about 1/4 inch thickness; if you go thinner, they get crispy and break easily. Thick cookies hold up to lots of icing and decorations. I use haunted house or rectangle cookie cutters, and then cut in little notches or windows using a knife for that “spooky” mansion look.
Bake the cookies at 350°F (175°C) for around 9 to 12 minutes. You’ll know they’re done when the edges are just barely turning golden. Cool them completely on a wire rack before any decorating, as warm cookies will melt your icing and candies into a mess.
Prepping Royal Icing for Decorating
Royal icing is key for haunted house cookies because it dries quickly, holds its shape like glue, and lets you get super creative. My method for mixing:
- Mix powdered sugar with either egg whites or meringue powder and water, following your preferred recipe.
- Beat on medium speed until the icing forms glossy, stiff peaks. If it’s too thick, add a tiny bit of water; too runny, just sift in more sugar.
- Divide icing into small bowls for each color—black, orange, purple, and green for the walls and roof, white for ghosts and spiderwebs. Use gel food coloring so your icing stays thick and bright.
If you want extra clean lines, pick up a few squeeze bottles or fine piping tips. For filling in big areas, a spoon or offset spatula works fast. Keep some toothpicks handy to nudge icing into corners or pop any air bubbles.
Fun Decorating Ideas for Haunted House Cookies
Here’s where the real magic happens. Decorating these cookies is the best part; I set up a decorating station with colored icing, a bunch of candies, and let everyone go wild. A few decorating ideas I use:
- Black and Gray “Roof Tiles”: Pipe scallops on the roof, or sprinkle with black sanding sugar for texture.
- Candy Eyes and Mini M&Ms: Use these for ghost faces, doorknobs, pumpkins, or creepy critters in the windows.
- Royal Icing Spiders and Webs: Pipe thin lines of white icing as webs, and black dots with thin legs for spiders creeping up the walls.
- Windows and Doors: Outline and fill shapes in orange or yellow icing; add little cracks or stitches for a haunted vibe.
- Lollipop Trees or Candy Corn Bats: Stick candy shapes around the house to look like the yard is full of Halloween surprises.
There’s no wrong way to decorate these, so I always suggest mixing colors and trying different designs on every cookie.
Tips for Getting the Best Results When Baking Haunted House Cookies
- Keep Dough Chilled: If it gets sticky while rolling or cutting shapes, pop it back in the fridge for a bit.
- Don’t Overbake: Slightly underbaked cookies stay soft and chewy. They’ll firm up as they cool.
- Use Parchment Paper: Makes it easy to transfer cookies and clean up afterward. It also keeps the bottoms evenly baked.
- Let Icing Dry: If you want to layer designs or add more candy, wait until the first layer of royal icing is totally dry. This helps keep edges crisp and colors bright.
- Decorate with Family or Friends: This is a fun activity to do together; everyone has their own decorating style, and sharing ideas is half the fun.
Common Troubleshooting: Solving Issues that Can Come Up
- Dough Spreads Too Much: Try chilling it longer or using less baking powder. Check that you’re measuring flour correctly, too.
- Icing Runs Off: Your icing is probably too thin. Add a spoonful of powdered sugar and mix again to thicken.
- Cookies Are Too Crunchy: Next time, bake a minute less and make sure you’re not rolling them too thin.
- Colors Bleed: Let each color dry before adding the next, especially with dark colors like black or purple.
Don’t worry if a cookie gets a little wonky. Most of the fun is in making each haunted house unique. Kids especially love making “crooked” or “collapsed” mansions.
Personal Tips for a Stress Free Haunted House Cookie Session
I’ve learned a few tricks over the years that make baking and decorating haunted house cookies much smoother:
- Double the batch if you’re having friends over. These cookies disappear fast.
- Pick up a pack of disposable piping bags to speed up decorating. If you don’t have any, zip top bags with a corner snipped off work in a pinch.
- Plan for drying time: Royal icing takes an hour or more to set fully, especially if you want to stack or package cookies.
- Let kids get creative with “mistakes.” Broken cookies make great haunted house “ruins.”
- Try adding a pinch of cinnamon or pumpkin spice to your dough for extra fall flavor.
Haunted House Cookies for Parties, Gifts, or Just Because
These cookies are great for sharing. I tuck them in treat bags for trick or treaters or arrange them on a platter for Halloween parties. If you’re giving them as gifts, layer parchment in between to keep icing details safe. And, honestly, they’re super fun to make together with family for a cozy autumn afternoon. The decorating process is hands on and always a highlight; everyone gets to show off their own spooky style.
Haunted house cookies also make fantastic centerpieces for themed parties. Arrange a variety of shapes and sizes, maybe even a few gingerbread style haunted mansions for a festive display. If you want to take it up a notch, provide edible markers or little bags of decorative candies so guests can add personal touches to cookies during the party. It’s a simple way to get everyone involved and make unforgettable party memories.
Kids particularly enjoy swapping ideas for new “features” — like adding gummy worms crawling out of the windows or edible glitter for a magical haunted touch. No matter your decorating level, the goal is to have as much fun with the process as with the sweet results.
Frequently Asked Questions About Haunted House Cookies
How far ahead can I bake and decorate haunted house cookies?
These cookies stay fresh for up to a week in an airtight container. If you need to, bake them a few days ahead and decorate the day before your party.
Is there a shortcut for royal icing?
You can use ready made royal icing mixes or even store bought cookie icing from the baking aisle, which can save time if you’re in a hurry.
Can I freeze decorated cookies?
Absolutely; just let the icing dry completely, layer them with parchment, and freeze in a sturdy container. Thaw at room temperature before serving.
What if I don’t have a haunted house cookie cutter?
Cut rectangles, triangles, or squares and build simple structures with icing “glue.” Or, print a paper template, lay it on the rolled dough, and carefully cut around it with a knife for custom shapes.
What’s the best way to let cookies dry?
Arrange them on a wire rack or tray, uncovered, in a cool spot. Avoid stacking or wrapping until the icing is completely dry to the touch. I usually give it a few hours, just to be safe.