
Dark Fairy Makeup Look Tutorial: Step by Step
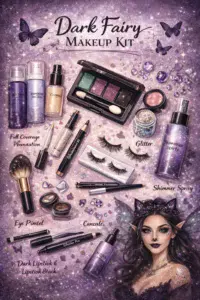

Dark fairies are enchanting, mysterious, and powerful, blending elements of gothic allure with magical elegance. This tutorial will guide you through creating a dark fairy makeup look that is both dramatic and whimsical, perfect for cosplay, Halloween, festivals, or creative photoshoots.
Step 1: Prep Your Skin
Tools & Products:
- Cleanser
- Moisturizer
- Primer (mattifying or illuminating depending on your skin type)
Instructions:
- Begin with a clean face. Remove any residual makeup using a gentle cleanser.
- Apply a hydrating moisturizer to create a smooth canvas. Dark fairy makeup involves bold colors and intricate details, so skin prep is crucial.
- Apply a primer suitable for your skin type. If you have oily skin, use a mattifying primer to ensure the makeup lasts. For normal to dry skin, a luminous primer helps give a magical glow under bold eye or cheek colors.
Tip: Allow the primer to set for a few minutes before applying foundation to prevent patchiness.
Step 2: Base Foundation & Contouring
Tools & Products:
- Full coverage foundation
- Concealer (1–2 shades lighter than your foundation)
- Setting powder
- Contour palette or cream contour
- Beauty blender or foundation brush
Instructions:
- Apply foundation evenly over your face and neck using a damp beauty blender or brush. A full-coverage foundation works best to create a flawless, almost ethereal canvas.
- Apply concealer under the eyes, on the bridge of the nose, and on the chin to brighten these areas. Blend well.
- Lightly set your face with translucent setting powder to lock the base in place.
- Contour your cheekbones, jawline, and forehead to sculpt your face. Dark fairy aesthetics favor high contrast, so don’t be afraid to go a bit deeper than usual, but blend seamlessly to avoid harsh lines.
Tip: A slightly cool-toned contour enhances the mystical, shadowy look.
Step 3: Eye Primer & Base Eyeshadow
Tools & Products:
- Eyeshadow primer or concealer
- Transition shade (neutral matte or soft gray)
- Eye brushes (blending, crease, and shader brush)
Instructions:
- Apply a thin layer of eyeshadow primer or concealer over your eyelids. This ensures the eyeshadow appears vibrant and lasts longer.
- Set the primer with a neutral or soft gray eyeshadow as a transition shade. Blend this into your crease to create depth.
Tip: A soft, diffused base helps dark colors blend without harsh edges.
Step 4: Create the Dark Fairy Eye Look
Tools & Products:
- Dark eyeshadow palette (deep purples, emerald greens, blacks, midnight blues)
- Shimmery highlight shade (silver, lavender, or metallic green)
- Eyeliner (gel or liquid)
- Mascara and optional false lashes
Instructions:
- Begin by applying a deep shade (black, plum, or dark emerald) to the outer corners of your eyelid, blending it into the crease.
- Apply a complementary shimmery color to the center of the lid to create a mystical gradient. A metallic purple or green adds a magical glow.
- Blend the edges carefully with a clean brush to create a smoky, ethereal effect.
- Apply eyeliner along your upper lash line, creating a dramatic wing. For an extra dark fairy effect, line your lower lash line as well. Smudge slightly with a brush or cotton swab to keep it soft and magical.
- Finish the eyes with volumizing mascara and optional long, fluttery false lashes to enhance the enchanted look.
Tip: You can add glitter or tiny gems along the eyelid crease or outer corner for a fairy dust effect.
Step 5: Add Magical Face Details
Tools & Products:
- Face jewels or rhinestones
- Glitter gel or loose cosmetic glitter
- Liquid liner or face paint
Instructions:
- Dark fairies often feature mystical designs like swirls, dots, or tiny stars on the temples, cheeks, or forehead. Use liquid liner or face paint to draw subtle designs.
- Apply cosmetic glitter or tiny rhinestones along these patterns or around the eyes for an ethereal shimmer.
- You can also add a subtle highlighter on the cheekbones, brow bones, and cupid’s bow. Choose a silvery or lavender highlighter to complement the dark fairy theme.
Tip: Use cosmetic adhesive specifically designed for glitter or jewels to ensure they stay in place.
Step 6: Eyebrows
Tools & Products:
- Eyebrow pencil or gel (matching your hair or darker for intensity)
- Brow brush
Instructions:
- Dark fairies often have defined, slightly arched brows for a dramatic effect.
- Fill in your brows with a pencil or gel, emphasizing the arch. You can extend the tail slightly for a sharper, mystical look.
- Set the brows with clear or tinted gel to keep them in place.
Tip: For a more fantastical effect, consider adding a subtle gradient or shimmer to the brows.
Step 7: Lips
Tools & Products:
- Lip liner (matching lipstick or slightly darker)
- Dark lipstick (deep purple, black, burgundy, or dark plum)
- Lip brush for precision
Instructions:
- Line your lips with a matching dark lip liner, slightly overlining if you want a fuller look.
- Fill in with dark lipstick, using a lip brush for precision.
- For a magical twist, add a touch of glitter or metallic pigment to the center of your lips.
Tip: Matte lips often work best with dark fairies, but a subtle shimmer can enhance the enchanted feel.
Step 8: Optional Special Effects
Tools & Products:
- Face/body shimmer spray
- Temporary hair color sprays or hair chalk
- Fairy wings or costume accessories
Instructions:
- Add a light mist of shimmer spray over your face, neck, and shoulders for a soft, magical glow.
- Temporary hair color sprays can create streaks of purple, green, or blue for a complete fairy transformation.
- Complete the look with costume accessories like fairy wings, pointed ears, or a dark floral crown to embody the dark fairy persona fully.
Tip: Keep shimmer and glitter light in areas that won’t interfere with photographs to prevent overexposure.
Step 9: Setting the Look
Tools & Products:
- Setting spray
Instructions:
- Once your makeup is complete, apply a generous mist of setting spray to lock everything in place.
- For an extra long-lasting effect, layer the setting spray—first a light mist, then a slightly heavier one after a few minutes.
Tip: Choose a setting spray with a slight dewy finish to enhance the ethereal fairy glow.
Step 10: Final Touches & Tips
- Ensure all lines are clean and blended for a professional finish.
- Dark fairy makeup allows for creativity—experiment with color gradients, jewels, or glitter placements.
- Take photos in soft, mystical lighting to capture the magic fully.
- Keep a small glitter brush or eyeliner on hand for touch-ups, especially if you plan to wear the look for events or parties.
Conclusion
This dark fairy makeup look combines dramatic smokey eyes, bold lips, and mystical details to create a magical, enchanted appearance. By following each step carefully—from prepping the skin to adding glitter, rhinestones, and finishing touches—you can achieve a truly otherworldly aesthetic. Whether for a festival, photoshoot, or costume event, this tutorial ensures your dark fairy persona will mesmerize everyone you meet.
If you have any questions or comments about this topic, please leave them down below and I would be happy to help you out.